Using Microsoft PowerPoint
Step 1: Setting Page Size Setting Page Size
- Open up a new presentation on PowerPoint
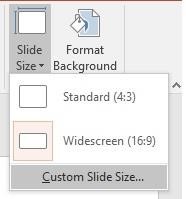
- Go to Design > Slide Size

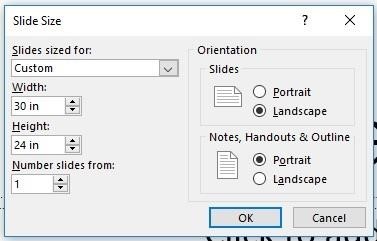
- Click the drop down and then select Custom Slide Size
- Change to 30 x 24 inches (or 24 X 18, etc.. anything between 24 and 30 inches WIDE and 18 and 24 inches in HEIGHT) Note that the Custom input is width X height.
Step 2: Designing Your Poster
In the toolbar, you have a number of tools to help you design your poster.
- Insert > Text Box allows you to draw a rectangular text box anywhere on the document. This will allow you to add written explanations of your visuals, titles, etc…
- Insert > Image allows you to insert visualizations saved on your computer.
- Insert > Shapes allows you to draw shapes, lines, or freehand squiggles and pictures on your poster.
- Design > Format Background allows you to change the background to a color or insert a picture. Warning: Image backgrounds can affect the readability of your text.
Step 3: Preparing your Poster for Submission
- Go to File > Save As > Select PDF Document (.pdf) from the dropdown menu.
Using Google Slides
Step 1: Setting Page Size Setting Page Size
- Open up a new presentation on Google Slides.
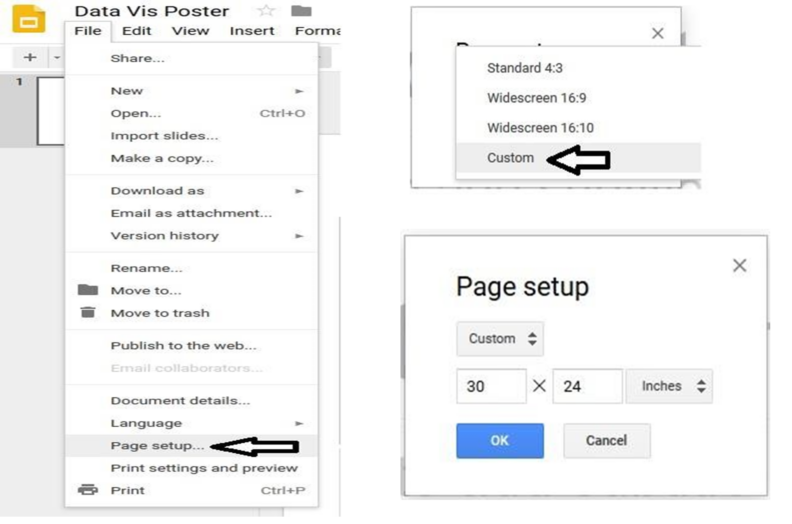
- Go to File< Page Setup.
- Click the drop down and then click Custom.
- Change to 30 x 24 inches (or 24 X 18, etc.. anything between 24 and 30 inches WIDE and 18 and 24 inches in HEIGHT) Note that the Custom input is width X height.
Step 2: Designing Your Poster
In the toolbar, you have a number of tools to help you design your poster.
- Select tool lets you click on a shape or text already inserted into your document and move it around.
- Text Box allows you to draw a rectangular text box anywhere on the document. This will allow you to add written explanations of your visuals, titles, etc…
- Image allows you to insert visualizations saved on your computer. The recommended resolution of images should be 125-225 dpi and the file format of the inserted image should be TIFF, PDF or JPG. If you enlarge an image, increase the size from the corner to maintain the proper proportion.
- Shape and line commands allows you to draw shapes, lines, or freehand squiggles and pictures on your poster.
- Background allows you to change the background to a color or insert a picture. Warning: Image backgrounds can affect the readability of your text. White or lighter color backgrounds are easier to read.
- Recommended font sizes:
- Title: 72-120 pt. o Subtitle: 48-80 pt.
- Section headers: 36-72 pt.
- Body text: 24-48 pt.
Step 3: Preparing your Poster for Submission
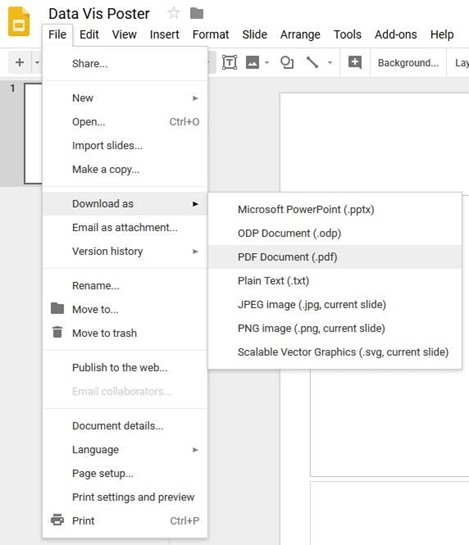
- Go to File > Download as.
- Click the drop down and then click PDF Document (.pdf)